Extending the cross slide travel.
If you have read my criticisms of the Vertical Milling Slide (VMS) sold for the WM180 and 7x12 and 7x14 Mini-lathes, you will have seen that the cross slide won’t travel far enough in to get the VMS past the centre-line of the lathe before the feedscrew nut detaches from the feedscrew. These notes may assist those who want to get a bit more use out of a VMS. Since buying a milling machine, I hardly ever use my VMS, but for other reasons I wanted to get the cross-slide to travel a bit further in.
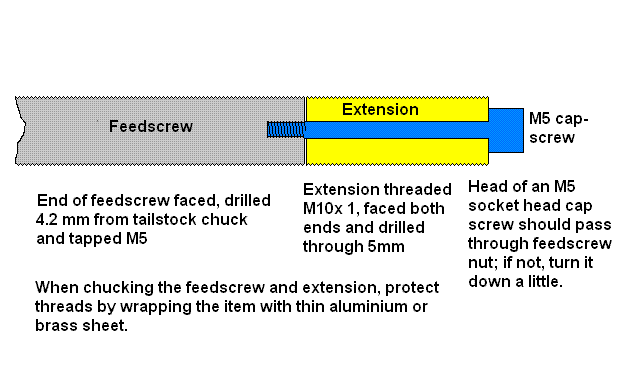
It struck me that the obvious answer was a longer feedscrew, coupled with the removal of the little plate at the back of the saddle, held on by two screws, which limited rearward movement of the slide. I could have made an entirely new feedscrew, but if there is an easier way of doing something, that’s always the route which appeals to me. I simply added an extension threaded M10 x 1 LH on to the feedscrew, retained with a long M5 socket head cap screw, as per the cross-sectional sketch below. My extension was 25mm long, but it could have been made longer.
It struck me that the obvious answer was a longer feedscrew, coupled with the removal of the little plate at the back of the saddle, held on by two screws, which limited rearward movement of the slide. I could have made an entirely new feedscrew, but if there is an easier way of doing something, that’s always the route which appeals to me. I simply added an extension threaded M10 x 1 LH on to the feedscrew, retained with a long M5 socket head cap screw, as per the cross-sectional sketch below. My extension was 25mm long, but it could have been made longer.
A few hints:
1. Don’t remove the feedscrew until after the extension has been threaded; you will need to use the cross slide for that.
2. The feedscrew will have to be faced by locking the cross slide and using the topslide angled at 90°.
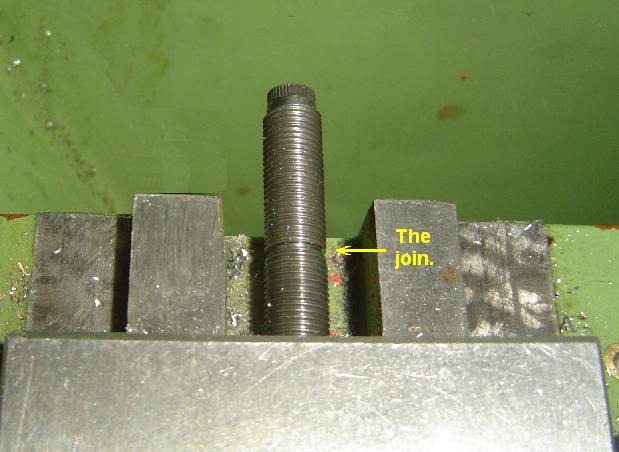
3. To align the threads on the extension with those on the feedscrew, remove the centre bolt in the cross slide surface so the feedscrew nut drops away. Then screw the feedscrew into one end of the nut and the extension into the other end (remember these are LH threads) so they meet in the middle, and tighten up as hard as you can by hand. The two will try to push each other apart within the nut, which will now be locked solid. Now add your M5 screw. As it is tightened up, it will pull the feedscrew and extension together slightly, and the nut will come free. You should be able to run it to and fro over the join with ease.
Some users may want to add more outward, rather than inward, travel to the cross slide when turning large diameter work. The slide’s forward movement is limited by it coming up against the raised portion at the front of the feedscrew bracket. An obvious solution to that is to add a spacer behind the bracket. But a second limit is set by the cross-slide nut bumping up against the end of the channel in the saddle within which it moves back and forth. The usual recommendation to solve this is to extend the slot as shown (on a 7x12 mini-lathe) in the penultimate picture here http://mikesworkshop.weebly.com/cross-slide-extended-travel.html . However, it strikes me that a less drastic method, involving no milling, would be to extend the feedscrew as above (or make a longer one from scratch) and drill new holes to reposition the nut further back under the cross slide.
Back to Home Page and Index


